The rug was a scarlet red with many varied bright colors, designs, and characters running along the perimeter and within the interior. The design, we decided should be simple and dark to amplify the primary colors and the intricate characters illustrated throughout. We decided on: jet black satin matting, an angled black frame, and UV protected acrylic for the best look and preservation. Because of the actual size of the rug, I knew this would be a big job which would require a lot of manual labor and patience in order to properly execute a stunning shadowbox. One issue that came up continuously was what to do with the fringe, which was along the entire perimeter of the rug and a bit erratic. Over time, the fringe around the rug would be weighed down by gravity which would cause the fringe to slowly slump down and flop over in an unappealing manner. Most rugs you see on the floor, the fringe is splayed out flat against the ground. Since this rug would be sitting upright on a wall, naturally the fringe would eventually succumb to gravity and begin to flop over on the all sides and worst at the top. This was of great concern because the fringe would partially obstruct the visibility at top of the rug. The customer displayed the rug on his wall for several years and told me the fringe flopping over didn’t bother him and didn’t really care if it was perfectly splayed out, considering it was the natural state of the rug. If he decided to sew down the fringe it would have taken several hours and would result in much higher labor costs for a fairly minor distinction. I asked for a little extra time to finish the shadowbox considering the size and manual labor required to properly sew it down. The customer was a bit concerned about the actual stitches in the rug in terms of preservation and potential damage. I reassured the customer the only way to properly secure a large and heavy fabric is to sew it down in key points and along the perimeter. If one was to use tacky tape, staples, glue, or some type of encapsulation the adhesives and staples would eventually dry out and rust as well as permanently damage the rug. I also told him rugs and tapestries in museums and galleries around the world are partially or completely sewn down to display them in a vertical fashion. As long as the threads are well made, don’t bleed, and suited for preservation, careful stitching would leave the integrity of the rug fairly true.
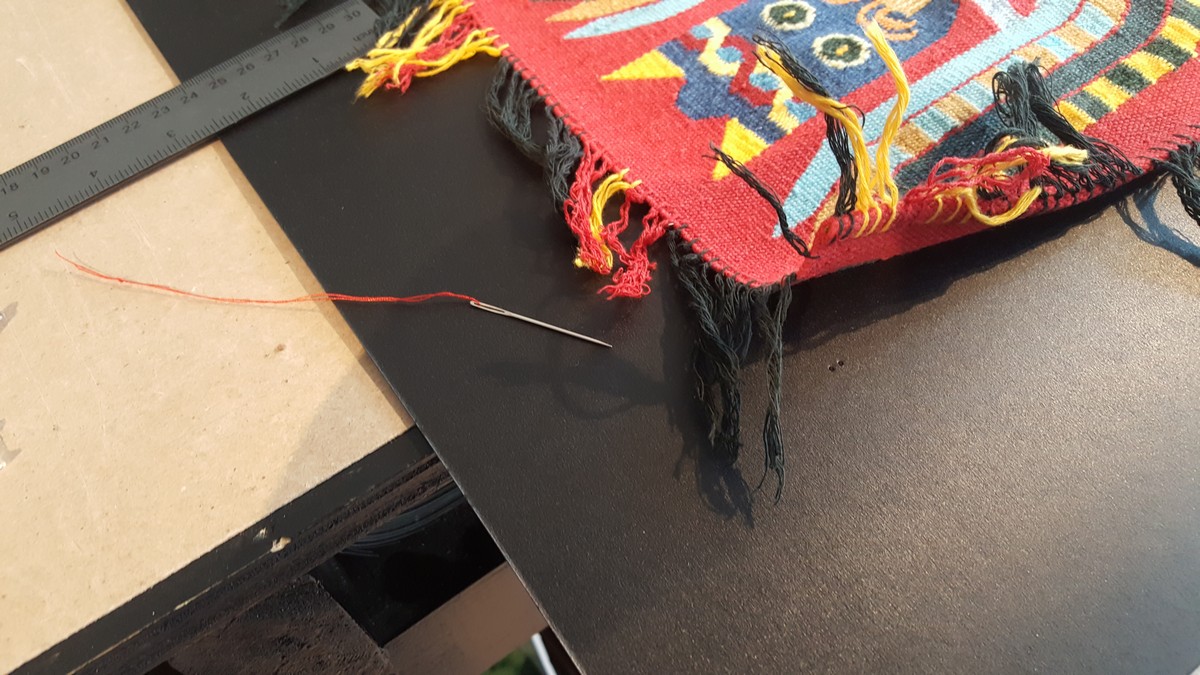
Once I had all of my tools on hand, I planned out my execution and checked on the initial design to make sure I was exacting in my measurements and materials. Considering the size of the rug and its relative materials, I knew I would need adequate space to work and to make sure my stitching was on point. The rug wasn’t very rectangular so I knew my side margins would be slightly off in some places, predominately on the sides. I walked around the rug several times with a ruler to make sure the rug was as centered and true as possible. Once I was satisfied with the positioning I began sewing in one corner and worked my way down along the perimeter. I staggered my stiches along the sides to make sure I wasn’t pulling the rug too much in one direction or putting too much strain in one corner. After I finished all my initial stiches I went back to fill in the gaps as needed, especially at the top of the rug which would be holding the brunt of the weight over time. When I felt confident the rug was securely affixed onto the mat board I held it upright to make sure it looked good in the vertical position. If I was dissatisfied with what I saw I would need to go back and make the proper adjustments to make it as flat and appealing as possible. I did notice when I held the rug upright that a few places in the interior of the rug weren’t lying flat or looked a bit lumpy. With some strategic pressing and smoothing I was able to get most of the lumps out with a few stiches in a couple specific areas. I was cautious because I didn’t want to overdo it, because over time the fibers and threads of the rug would eventually expand and contract because of the seasons and relative humidity. If I were to constrict the rug too much it would put strain on the fibers resulting in possible damage or even splitting.
Once the rug was properly sewed down, I set it aside until I finished the other components of the shadowbox and to make sure it wouldn’t be inadvertently damaged. Next, I grabbed the frame, glass, mat board, and foamcore for the following stages which consisted of building up the sides of the shadowbox. First thing was to set the glass inside the frame and to make sure the glass stayed clean and uncompromised as possible. I then measured the depth of the rabbet and the length of the lip to make sure I had adequate space for the sides to properly fit. The sides give the shadowbox its depth and perspective and really set the piece apart from common frame designs. Just to be sure, I then referred to the initial design to make sure the depth was correct and the materials were consistent. In order to get straight and true cuts for your shadowbox sides it’s best to use a trimmer or mat board cutter. If the cuts are off or ragged, the inconsistencies will definitely show through in the final product, and will effectively ruin the whole viewing experience. It always best to have more than what you need, just in case you have to recut some if not all of the sides if they don’t properly line up along the perimeter of the rabbet. You must use glue to secure the sides in place, if not; they will eventually peel away from the wood overtime. I used a combination of framer’s glue and a tacky ATG tape to secure all of the shadowbox sides and allowed them to cure for about 30-45 minutes before moving onto the next stage.
When the sides were secured and the glass was cleaned on the inside, I took the mounted rug and carefully placed it onto the sides of the shadowbox. I put a few framers’ points to temporarily hold it in place and took a gander at the front to see how the final product would look. If was I was happy with what I saw, I would remove the points, clean out any debris or lint stuck inside, and securely replace the flag with several framer’s points along the perimeter. If I was unhappy with what I saw I would remove the rug and try to fix any potential issues, such as dirty glazing, excessive debris, or stains on the mat. If there was something drastically wrong with the mounting or the placement of the sides, I would need to start all over considering there is no simple fix for most of these issues.
Once the inside of the shadowbox was cleaned and the rug was secured in place with the proper amount of framer’s points I applied a dustcover and plastic bump-ons to the bottom two corners of the frame. The dustcover is usually made of Kraft paper or an acid-free stock which covers the back of the entire shadowbox in order to keep dust, pests, moisture, and humidity away from the artwork. The bump-ons keep the shadowbox adequately away from the wall so that air can circulate behind the frame and to prevent the bottom corners of the frame from scratching and scuffing your nicely painted walls.
You must be logged in to post a comment.
click here to log in