A Wedding Dress: Old, Tattered, Generational, and a Birthday Surprise
This was a long and fevered process but with a dynamic and meaningful ending. It involved a lot a pre-planning, over- the- phone designing for a garment that was old, tattered, and fragile. This was also meant to be a surprise for their wife/mom for her upcoming birthday and her daughter’s subsequent wedding. The original plan was for the daughter to wear the wedding dress during the ceremony but considering the age, color, and fragile state of the garment it was best to preserve the dress inside a frame. The dress was about 75 years old being handed down from generation to generation. The father and daughter really wanted to do something special to prevent further deterioration and to present the dress in a way that future generations could proudly view and appreciate a family heirloom. I noticed right away that there would be some issues in mounting and handling but nothing that proper planning and the right materials couldn’t fix.
When the dad brought the dress down to the shop, he had it folded nicely in a cardboard box, eager to get started. He already knew he wanted something simple and straightforward but with class. He admitted that he didn’t have much of a knack for design but he really wanted the dress presented nicely with archival materials. He thought it would be best that I talk to his daughter over the phone (who lived in San Francisco) to plan out the frame design and the preservation. We chatted a bit about colors, preservation, and the overall look but we both found it challenging to fully design the layout without her being able to see samples and look at options. It turns out the daughter was coming to Baltimore for some time in the following month, so we decided that could do the design person to person in a few weeks.
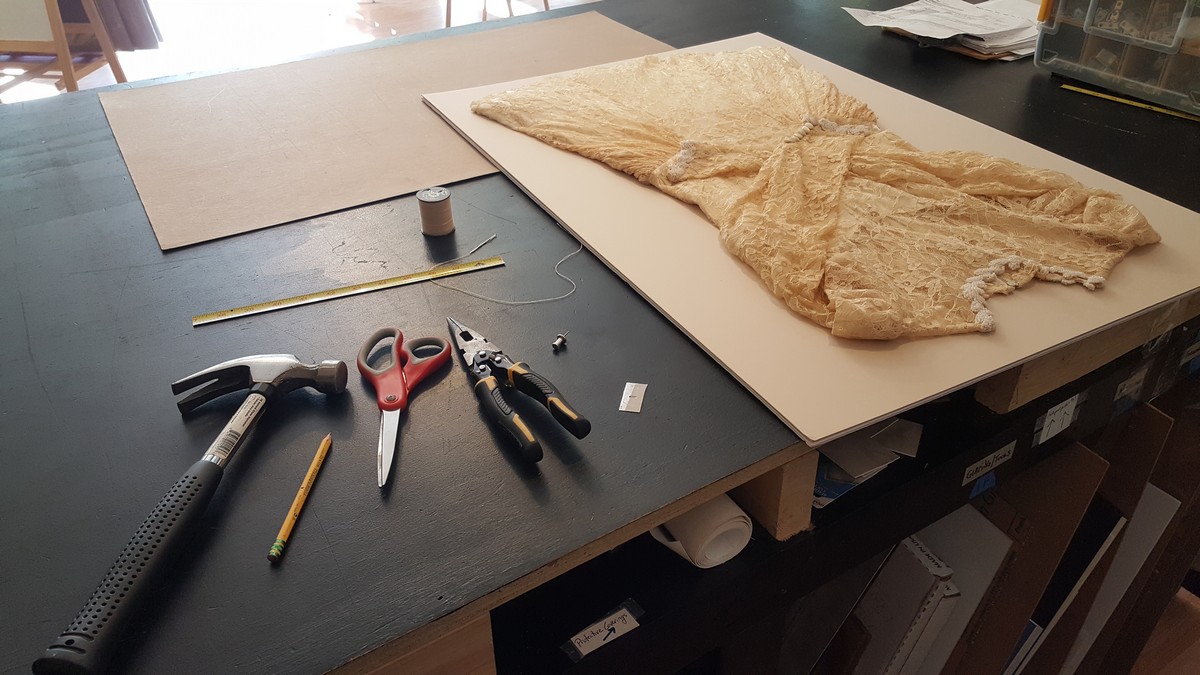
A few weeks later, the father and daughter came into the shop with the wedding dress in tow, excited to get started. Turns out, there was a bit of a time crunch as well. It would need to be completed within 3 weeks, no longer, with a firm deadline because they were traveling later in the month. To save on costs, size, and time needed we decided that we would cut the dress about halfway down and fold the remaining material underneath. Because of the frilly nature of the dress, its depth would require a deep frame to accommodate the material. Not having many options for deep frames, we decided to look at shallow frames which provided more variety and style. This would require a longer mounting process to properly stitch down the dress so it wouldn’t touch the glass/acrylic. We decided to compliment the current color of the dress, which had yellowed and browned for some time. If we chose anything lighter or darker than the dress, the yellowish color would be extenuated in an unflattering way. Softer tan colors and hints of gold really highlighted the delicate lace and the soft glow of the dress. The frame they chose was a bit shallow but considering I had extra time for mounting the likelihood of the dress touching, let alone sticking was very small considering they decided on acrylic glazing. After much scrutiny, we decided on a good distance to cut the dress in order to fold the remaining material underneath. It took several attempts but I was finally able to cut through the dress with a pair of regular scissors. I played it very conservative and left way more material than I needed so there was no possibility we’d cut too short. We also decided to cross the arms because it looked more natural than straight down the sides.
I knew the mounting of the dress was going to be the biggest challenge and the most time consuming. I gave myself plenty of time to plan the layout and get a feel of the fabric which was a: delicate and tattered yellowed frilly lace. If I didn’t execute the proper mounting techniques there was a good chance the mounts would tear the lace apart or put too much strain on the integrity of the dress. I did a few tinsel strength tests on various parts of the dress to see how it would hold up under stress and gravity. And despite its appearance and age it held up pretty well which put me at ease about the whole mounting process and being confident that it wouldn’t fall apart. Considering all the layers in the dress I had to make big puncture holes through both the dress and the substrate underneath. I began mounting the dress along the top portion about one inch apart being mindful of the natural look of the dress as I moved along. I ran into a couple issues around the shoulders of the dress as the material began coming apart as I was trying to mount the delicate fabric. I used a slightly different stitch and several mounts to remove the strain and pressure of the mounting threads. When I was done with the majority of the mounting I was able to move the dress around and not worry about any mounts coming loose. The bottom of the dress was the most difficult because it involved a large amount of material which had to be properly sewn down and look nice and presentable to view. Through many contortions and rearrangements the dress was mounted in a natural fashion without any obvious mounting points or material issues.
When I was satisfied with the mounting and the look of the dress, I measured the marginal space around the dress several times to make sure it was mounted evenly. The next step was fitting the Ultra Vue glass and the shadowbox sides. The sides give the shadowbox its depth and perspective. I used a combination of framer’s glue and a tacky ATG tape to secure all of the shadowbox sides and allowed them to cure for about 30-45 minutes before moving onto the next stage.
When the sides were secured and the glass was cleaned on the inside, I took the dress and carefully placed it onto the sides of the shadowbox. I put a few framers’ points to temporarily hold it in place and took a gander at the front to see how the final product would look. If was I was happy with what I saw, I would remove the points, clean out any debris or lint stuck inside, and securely replace the dress with several framer’s points along the perimeter. If I was unhappy with what I saw I would remove the dress and try to fix any potential issues, such as dirty glazing, excessive debris, or stains on the mat. If there was something drastically wrong with the mounting or the placement of the sides, I would need to start all over considering there is no simple fix for most of these issues.
Once the inside of the shadowbox was cleaned and the dress was secured in place with the proper amount of framer’s points I applied a dustcover and plastic bump-ons to the bottom two corners of the frame. The dustcover is usually made of Kraft paper or an acid-free stock which covers the back of the entire shadowbox in order to keep dust, pests, moisture, and humidity away from the artwork. The bump-ons keep the shadowbox adequately away from the wall so that air can circulate behind the frame and to prevent the bottom corners of the frame from scratching and scuffing your nicely painted walls.
You must be logged in to post a comment.
click here to log in